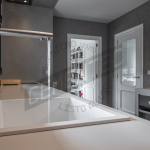
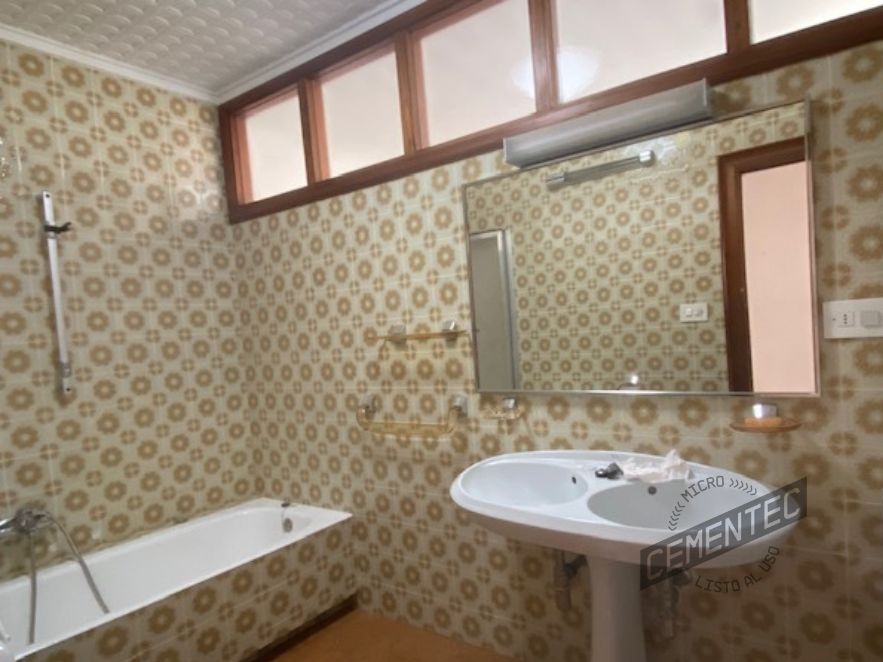
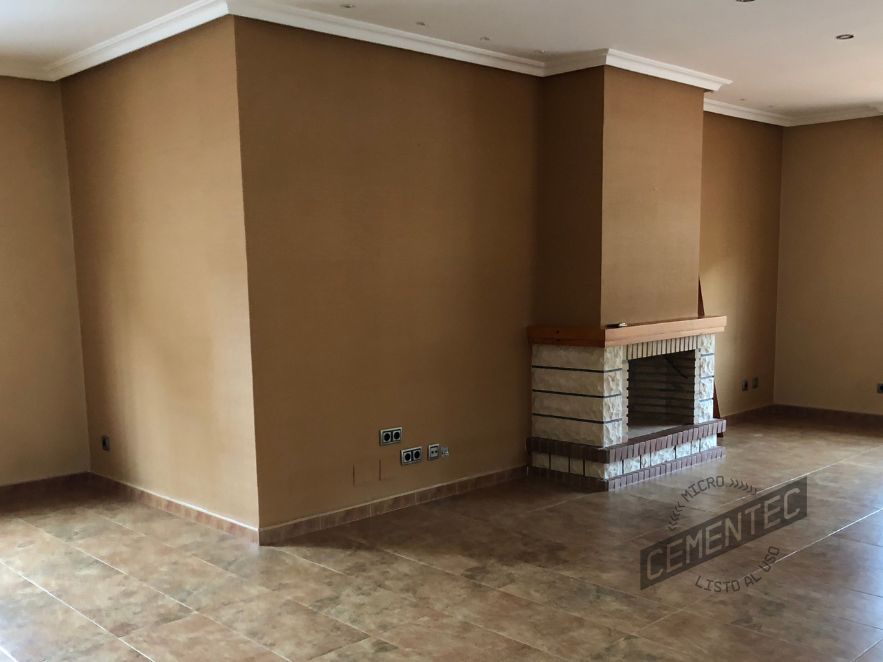
Do you want to renovate your old house? Don’t you know what to do with those old tiles of your bathroom and kitchen? Let us give you a solution accordingly to what your home or premises deserve. Covering tiles with microcement is the best solution as a decorative coating when renovating a room with old tiles. Choose microcement on tiles!
This is what it is, due to its great adherence capacity and because it offers an immediate and fast response without construction works or debris creation when carrying out a renovation at home. Microcement offers an added value that other coatings or materials on the market do not offer and that awakes interest if microcement can be placed on tiles in the bathroom, kitchen or certain rooms.
Therefore, we are facing one of the decorative options at the moment. Maybe, the most demanded option chosen by the clients during the last years, and also by architects, interior designers and worker staff.
Stay with us and find out all the advantages, tips and suggestions that Cementec offers you to successfully carry out a style change of your room.
Is applying microcement on tiles easy? Let’s check it.
Advantages of applying microcement on tiles by cementec
As we have previously mentioned, considering that microcement can be applied on tiles, let’s check the advantages or positive aspects that this decorative coating can provide. Choose the microcement Ready-To-Use Cementec could bring us the following benefits.
Applying microcement on tiles without works
First at all, the microcement ready-to-use stands out to have excellent adhesion capacities and compatibility with any type of material. One of them, the tiles, which are likely to be coated despite their irregularity and without the need to be removed.
This fact allows the possibility of carrying out renovations without having to undertake works to remove the tiles. We say it again, it will not be essential to demolish or take out the tiles, reducing in this way the generation of debris.
Consequently, there will be a remarkable saving in time and money, both for the owner, for those who are in charge of carrying out the renovation and for the neighbours.
Go for making a quick turnaround and modernisation thanks to on tiles
Another advantage is that applying microcement on tiles will let you to make in an easy, fast and direct way a renovation, turnaround and modernization of your rooms, changing completely the design and style of them.
Take advantage of the multiples decorative microcement options thanks to the combination of textures, varnishes and colours, all of them available in our webpage.
USe its non-slip and waterproof characteristics
There is nothing that seems more comforting than observing how applying microcement on tiles can give you the possibility of take advantage of the use of its characteristics. For example, it could be the case of its non-slip property, where falls or slips have no place.
Secondly, other advantages to apply microcement on tiles could be its waterproof properties for both areas kitchens and bathrooms. Both of them are rooms that can suffer from relative humidity and on which not all the decorative coatings can be used.
That is why Cementec has developed a product called PRIMER which is used to seal the tiles of your kitchen or shower that are going to be coated with Ready-to-use microcement.
Tomás Amat, architect, creative and manager of Cementec
So, can microcement be laid on tiles?
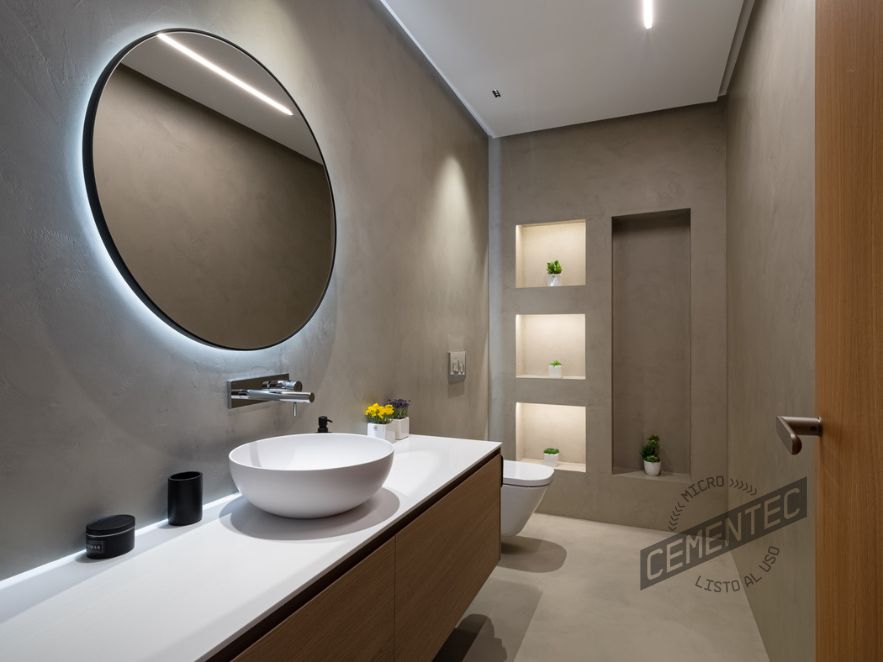
Yes, ready-to-use microcement is ideal for application on tiles without the need to remove them, which allows for quick renovations, without debris and with less hassle. In addition, it is a material that offers excellent adhesion to irregular surfaces, transforming spaces in a modern way. It is also waterproof and slip-resistant, making it perfect for bathrooms and kitchens, where moisture resistance and safety are needed. By choosing Cementec microcement, finishes can be customised, from colours to textures, creating a unique style without major renovations.
Tips about microcement application step by step
Is applying microcement on tiles easy? This is a question that we have done at the beginning of the article and we are going to answer it immediately. Apply microcement on tiles by our own means is something boring. In fact, it requires a series of theorical and practical knowledge of the subject.
Despite the fact that, at this point, we confess the process to you, we strongly recommend having the help of a professional and qualified applicator like ours, who is capable of carrying out your renovation without regretting some frequent microcement problems.
According to all this, proceed to analyse the subject point by point. Do not miss the advice that Cementec has come to tell you about how to apply microcement on tiles step by step.
How to apply microcement on tiles in 8 steps
Check the state of the tiles
First step and before applying the microcement, we have to examine the condition of the surface. We mean, the state of the tiles must be examined exhaustively, any type of damage, humidity or imperfection that hinders the perfect sealing or result of the ready-to-use microcement.
If any said inconvenience is identified, it will have to be repaired it before applying the coating. Therefore, the importance that the renovation is carried out by a professional or an applicator able to recognize these imperfections.
Clean prior surfaces before starting the application
After carrying out the required repairs, if necessary, the tiles must be thoroughly cleaned before applying the microcement. We do that to eliminate the dust and particles that can hinder the adherence of the microcement.
Fill in tiling joints with a microcement layer
Let’s do it! Once the previous required steps of evaluation and cleaning of the surface have been carried out, we are ready to apply microcement on the tiles as a first initial layer. This layer is aimed to the total filling of the joints, which confers the definition of continuous coating to the microcement.
This procedure is essential because filling the joints will create a stable support without unevenness.
Priming the titles and joints filled with microcement
After filling in the joints and getting an even surface, it must proceed to apply a primer or adherence layer. This will promote or create a link between the tiles and the microcement to improve its adherence.
Place fiberglass mesh during the first microcement layer on tiles
In the same way, and after drying time has elapsed, we should place a fiberglass mesh on the tiles before applying one layer of microcement BASE. In this case, we will get a stronger coating against possible appearance of fissures, cracks, etc.
Immediately after, first layer of microcement Cementec BASE will be applied. And after its drying time, it will be scratched with the trowel to eliminate any imperfection that has appeared.
Applying second layer of microcement base ready to use
Once this step is reached, a second layer of microcement BASE will be applied with the desired colour. Again, the surface must be dried and sanding the layer to correct any imperfection appeared.
Define and apply the finish of the desired microcement
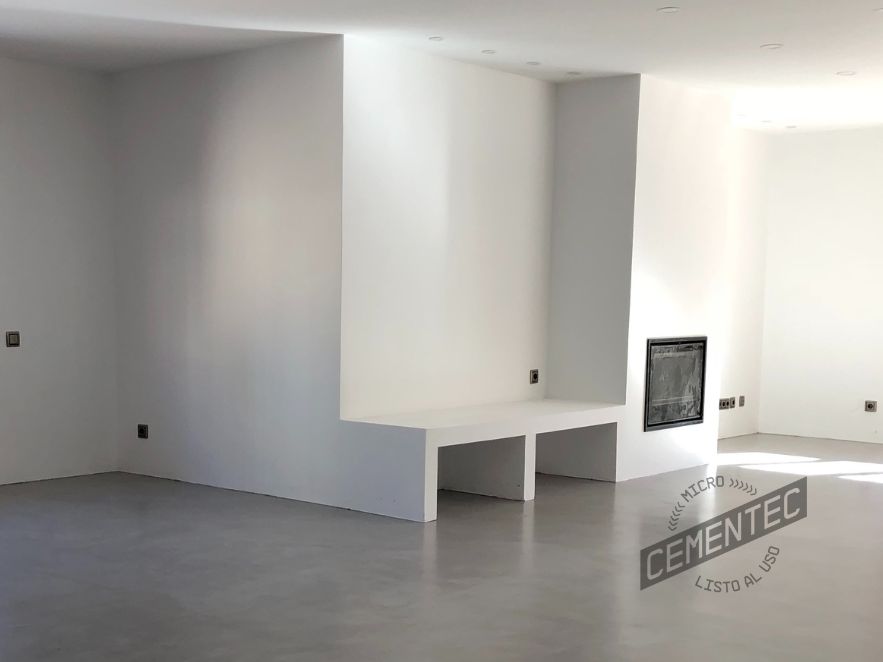
This is one of the last steps, in fact, it will define the finish of the microcement that we will obtain in our room. CEMENTEC offers three ranges of products (Pure, Water Resistant and Extreme) among which we recommend the first, because it contains standard, texture and vintage finishes or the second for its water-resistant quality.
In any case, two layers must be applied with the selected finish and the area must be sanded again.
Seal and protect the renovated surface
Finally, we will use products to protect and seal the microcement coating on tiles, such as the Finish Forte varnish or the Primer sealer.
Do you find these steps useful? Do you now think it is easy to apply microcement on tiles? Tell us about it on any of our social networks.
Recommendations
Aprovechamos la ocasión para resaltar que, al aplicar microcemento en baños sobre azulejos o para cubrir azulejos en We did not want to miss the opportunity to highlight that in the cases in which microcement is applied on tiled bathrooms, kitchens or on any other surface, the following recommendations must be taken into account:
- Respect the drying times marked by the manufacturer.
- The priming process must be carried out before applying the microcement layers.
- Let dry 24 hours (minimum) before proceeding to apply the first layer of BASE microcement.
Without further ado, with these recommendations from our Cementec applicators, you will be able to carry out your renovation with microcement on tiled kitchens or bathrooms without any type of problem. Trust our team to buy the material that you need or to proceed to make your work in the best possible way.
Did you find this article interesting about how to apply microcement on tiles step by step? Share your opinions on our social networks and send us your recommendations or results after the application.